

If you run an online store with WooCommerce, making navigation easy for your customers is essential. One simple way to do this is by adding a floating button with a popup menu for WooCommerce.

A button that opens a popup menu with all your product categories and subcategories. This guide shows you how to build it step by step, using a lightweight custom plugin.
Table of Contents
WC Floating Categories Popup
The WC Floating Categories Popup is a lightweight WordPress plugin that adds a floating button to your WooCommerce store. When clicked, it opens a responsive popup displaying your full product category tree with expandable subcategories. This makes it easy for customers to browse and find products without digging through menus.
Features
-
🚀 Lightweight & Fast – no heavy scripts or slowdowns.
-
📱 Responsive Design – works perfectly on desktop, tablet, and mobile.
-
♿ Accessible – supports keyboard navigation, ARIA labels, and ESC key to close.
-
🎨 Customizable – easily change button color, label, and position with CSS.
-
🔗 WooCommerce Integration – automatically pulls product categories and links to archive pages.
-
✅ Multiple Closing Options – close with ESC, overlay click, or the built-in close button.
1. Create the plugin folder and file
- Go to your WordPress installation via FTP or File Manager.
- Navigate to: wp-content/plugins/
- Create a new folder named: wc-floating-categories
- Inside this folder, create a file named: wc-floating-categories.php
2. Add the plugin code
Open the wc-floating-categories.php file and paste the following starter code:
<?php /** * Plugin Name: WC Floating Categories Popup * Description: Adds a floating button that opens a popup with your WooCommerce product categories. * Version: 1.0 * Author: Your Name */ if (!defined('ABSPATH')) { exit; } // Enqueue styles and scripts add_action('wp_enqueue_scripts', function() { wp_enqueue_style('wc-floating-categories-style', plugin_dir_url(__FILE__) . 'style.css'); wp_enqueue_script('wc-floating-categories-script', plugin_dir_url(__FILE__) . 'script.js', ['jquery'], null, true); }); // Display floating button + popup add_action('wp_footer', function() { ?> <button id="wc-floating-btn" aria-haspopup="true" aria-controls="wc-cat-popup">Categories</button> <div id="wc-cat-popup" class="hidden" role="dialog" aria-modal="true"> <div class="wc-cat-popup-content"> <button class="close-popup" aria-label="Close">×</button> <h2>Product Categories</h2> <?php wp_list_categories([ 'taxonomy' => 'product_cat', 'title_li' => '', 'show_count' => false, 'hierarchical' => true ]); ?> </div> </div> <?php });
3. Add the styling
Create a new file inside the same plugin folder called style.css and paste this CSS:
 #wc-floating-btn {
 position: fixed;
 bottom: 100px;
 right: 20px;
 background: #ffcc00;
 color: #000;
 padding: 10px 15px;
 border-radius: 50px;
 font-size: 14px;
 z-index: 9999;
 cursor: pointer;
}
#wc-cat-popup {
 position: fixed;
 top: 0; left: 0;
 width: 100%; height: 100%;
 background: rgba(0,0,0,.6);
 display: flex;
 align-items: center;
 justify-content: center;
 z-index: 10000;
}
#wc-cat-popup.hidden {
 display: none;
}
.wc-cat-popup-content {
 background: #fff;
 padding: 20px;
 max-width: 400px;
 width: 90%;
 border-radius: 12px;
 overflow-y: auto;
 max-height: 80%;
}
.close-popup {
 background: none;
 border: none;
 font-size: 24px;
 float: right;
 cursor: pointer;
}
4. Add the JavaScript
In the same folder, create a file called script.js and paste this:
 jQuery(document).ready(function($){
 $('#wc-floating-btn').on('click', function(){
 $('#wc-cat-popup').removeClass('hidden');
 });
 $('.close-popup, #wc-cat-popup').on('click', function(e){
 if(e.target !== this) return;
 $('#wc-cat-popup').addClass('hidden');
 });
 $(document).on('keydown', function(e){
 if(e.key === "Escape"){
 $('#wc-cat-popup').addClass('hidden');
 }
 });
});
5. Activate the plugin
-
Go to WordPress Dashboard → Plugins.
-
Find WC Floating Categories Popup.
-
Click Activate.
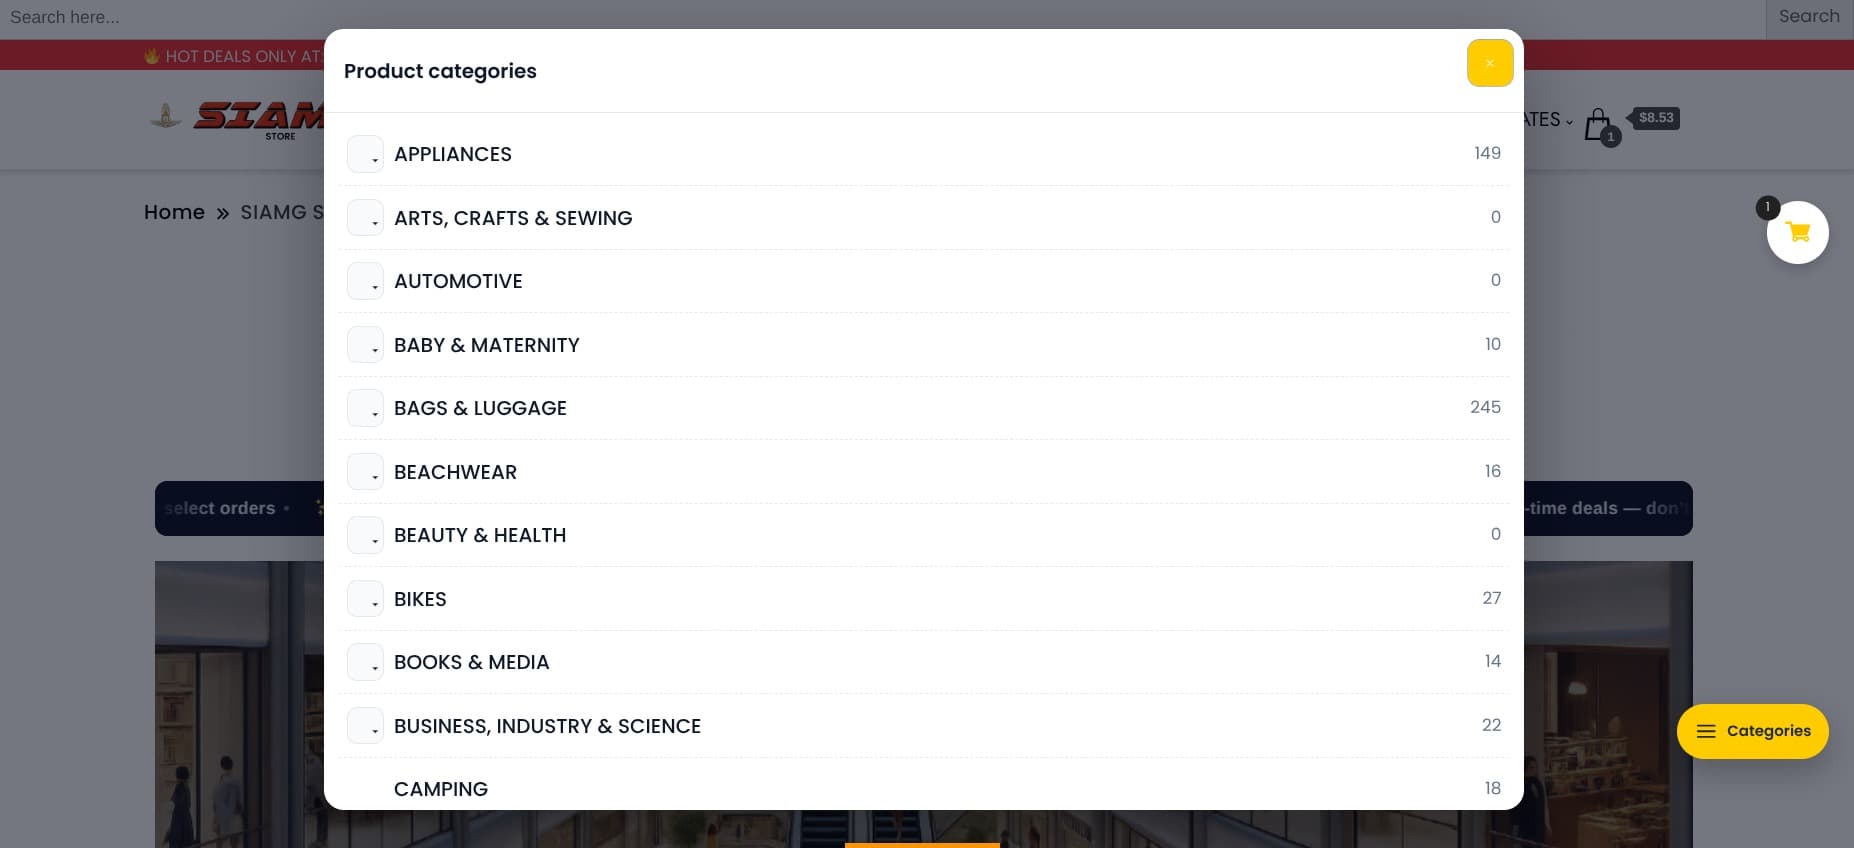
You should now see a small yellow “Categories” button floating at the bottom right of every page. When clicked, it opens a popup with your full WooCommerce category tree.

6. Usage
-
Click the floating Categories button to open the popup menu.
-
Navigate categories and subcategories to quickly browse products.
-
Close the popup by pressing ESC, clicking outside the popup, or hitting the close button.
-
Customize the button style and position by editing the included CSS (
style.css).
7. Tips for customization
-
Change the color/position by editing the CSS in
style.css. -
Hide empty categories by adding
'hide_empty' => truein thewp_list_categories()call. -
Improve accessibility by adjusting ARIA labels if needed.
-
Enhance features with a search bar, “expand/collapse all” option, or icons.
👉 That’s it! You now have a responsive floating menu that helps customers quickly browse your product categories.
[Download Now] and give your customers a faster, easier way to navigate your WooCommerce store!

Digital Designer, blog writer and also a tech enthusiast.
He loves to write content for blogs, podcasts, design websites, logos, brochures, banners and anything that sends a message to an audience.
You can contact Daniele at the link below:


