

Ever wondered why sometimes a web page with a few of graphics and images takes an incredible time to load?…I bet it happened to you more than one time.
Well here is why.
The person who designed that web page did not spend enough time in resizing and web optimizing the images, perhaps he did not even know that if you upload a picture to your web site as it comes out from your camera or mobile phone it will be way to heavy for the web standard.
Every camera or smartphone in use today might produce images with an average size that varies from 3000px till 5000px or even more. This pixels are needed for printing the images, no doubt on that, however, for web view, you don’t need that many, actually much less will still display fine.
In order to have a faster page load on web pages we not only need to resize the image to a smaller scale but also to apply some web optimization, or in other words, “compression”. Imagine the same effect of when you have to send an email with a large file and you “ZIP” it so that the file has a smaller footprint. Even if the technology for the ZIP file is different the effect is the same as we “compress” the original file and we obtain a smaller file in the end.
Each one of the pictures and graphics of any web page have to be downloaded and saved on the browser local cache in order to be ready to be viewed, so the smaller the faster. Having said that, we still need to use the best tools available for compression, by overdoing on compression or choosing the wrong settings, there is a chance of compromising the quality of the images once these have been processed.
If you are new to image editing and are wondering how to cope with these tasks, prior to add a photo to your blog read thorough this tutorial, it is made with simple language and with images to show you in more details how to achieve images web optimization in a few simple steps.
Let’s start our tutorial by opening the image file with the editing software of our choice. In this case we are using Adobe Photoshop but if you don’t have it installed on your PC, do not worry, for this purpose you can use any other image editing software as this is a generic task that almost any application of this sort will be able to perform.

I will use Adobe Photoshop as this is the tool of my choice. Nothing wrong with Software like Paint.net or Gimp which are free and Open Source, but the amount of extension and Plugins that you can run on Photoshop is great and it can make your life as a designer much easier.
-Right Click on your photo and select to open with Photoshop, (double click on it if Photoshop is already set as default software to open image files).
-Once your chosen photo is loaded on your screen select “image” from the top menu and then click on “image Size” from the selection.

As you can see this is not a huge file but for the purpose of our tutorial let’s imagine that we want an image square in size and want achieve a maximum of 512px. As the image is rectangular in shape, we have to resize down to 512 pixel from the lower value first which in this case is the height, (as shown in picture where it counts 856px in height). So click on the height value and type 512, make sure that all three option on the bottom left are checked so that your image will resize proportionally.

After pressing OK, from the top menu select image again but this time click on “Canvas Size”

Choose pixels from the cascade menu on the right as this is the unit we are using for our optimization.

You can use the anchors to decide which portion of the image you want to crop. This time we will cut the photo rather than resizing as the height is already set at the value we want to achieve of 512px. So for instance if I would like to keep the image as it is and just crop from the edges in a way that the sausages stay in the middle you would have to live the default selection which is the one in the example picture below. If instead you wanted to keep the left or the right you would just select either the left or right anchors so that the cropping would start counting 512 pixel form the either the left or the right side. You can try a few times and see how this tool can help to cut a perfect images at the exact amount of pixel we want without having to use the crop tool and guess sizes.
Make sure the “relative” box is unchecked as that is used to add more canvas to an images rather than to crop.

As mentioned before, on this case we can leave the anchors on default as you would want the crop to happen over the edges and keep the image focus on the center. Now you can set the width value at the same value as the height of 512 px. This time instead of a proportional resize, the height will not change at all and the width over 512px will get cut off from the photo. You can press OK and action the canvas cropping.

You now have a nice perfect square picture with both height and width of 512px.
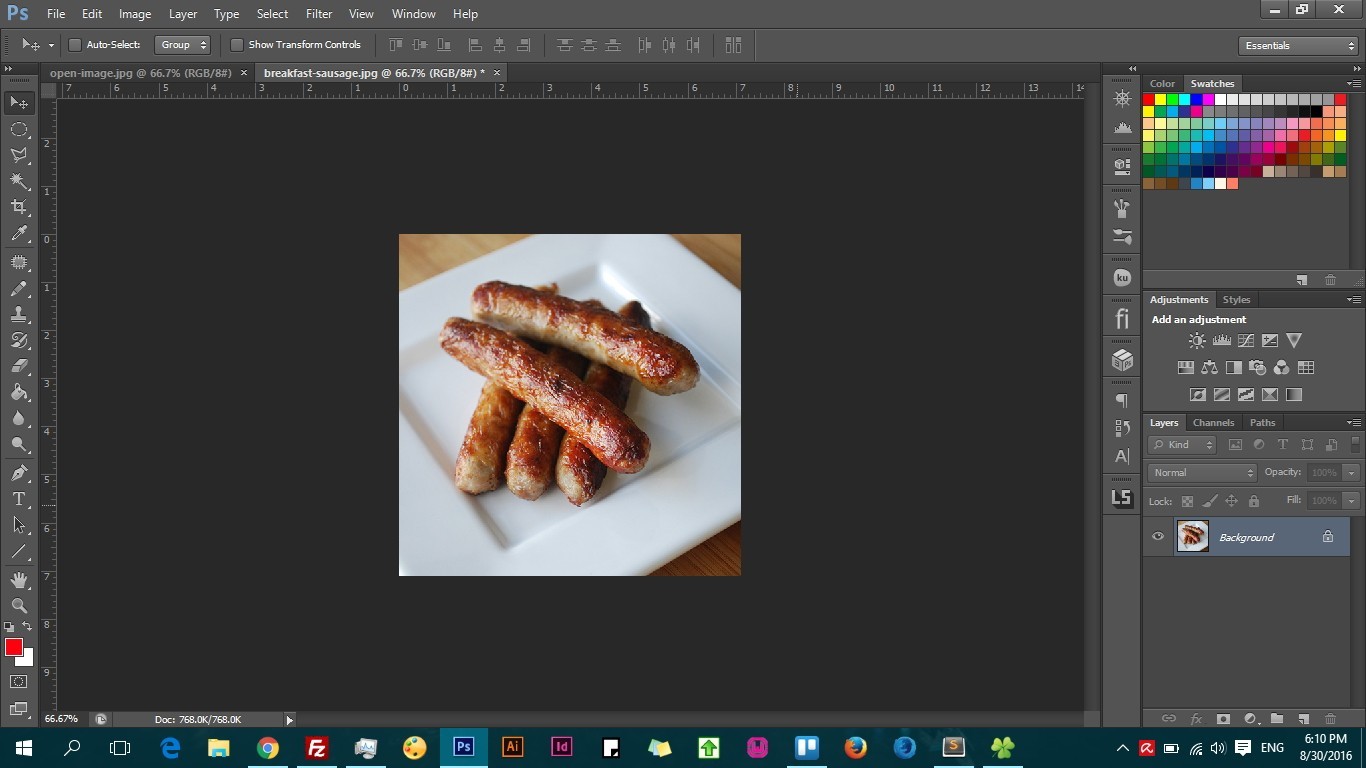
We have almost finished, now we just have to do a little bit of optimization. From the top menu select “File” and then “Save for Web”

Photoshop will load its own optimization tool.
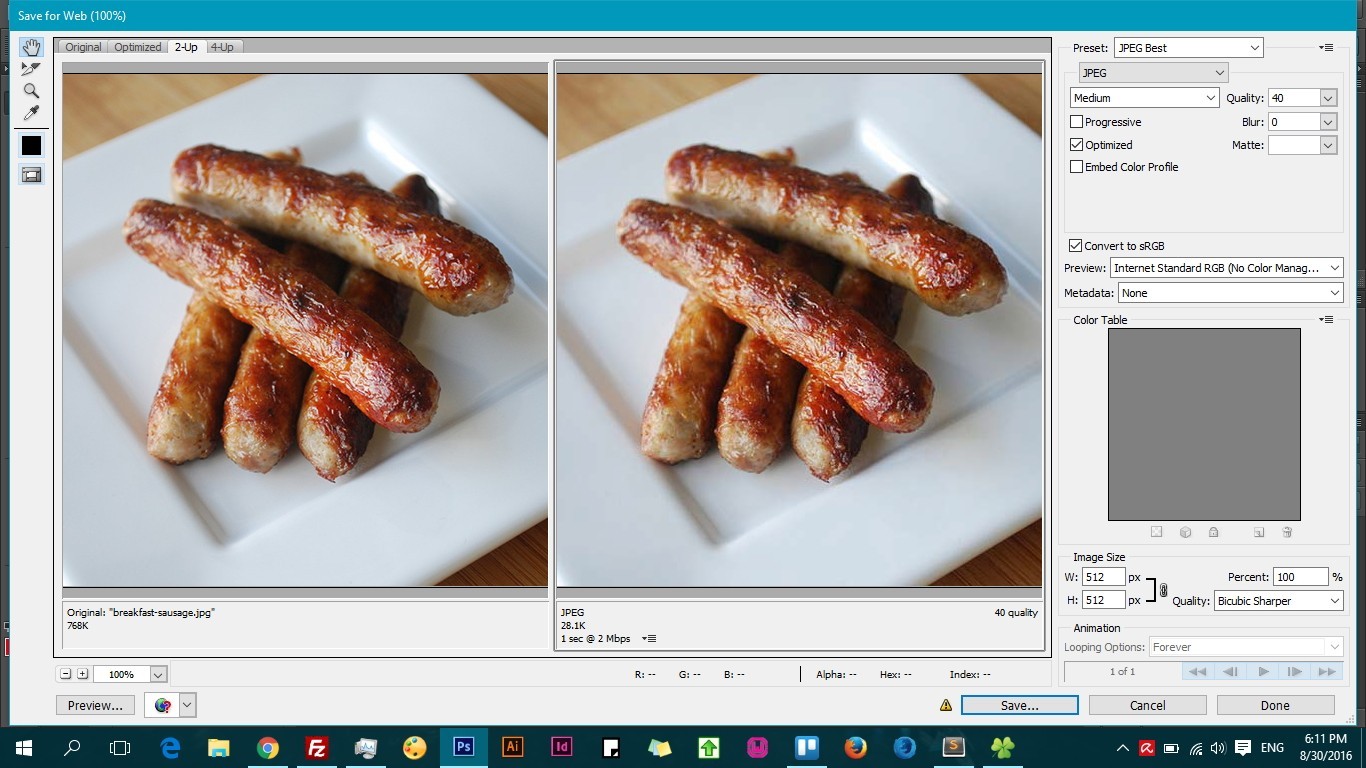
There is loads of choices on the customization tool and you can spend some time and try many of them as I did in the past, in the picture below you can see my standard jpeg compression values, you can also see that in the left hand side of the tool panel the initial file is sized at 768k which is very high for a web photo. Now look on the right hand tool panel and see that we came down to just 28k, this still keeping a pretty good resolution.
Press save.

The job is done, you now have an image that can display with reasonable size and resolution and that loads more than 10 times faster from the original file. You can cliche here to download this tutorial as a PDF file.
Thank you, I hope this tutorial helped, you can write your feedback in the comments below.

Digital Designer, blog writer and also a tech enthusiast.
He loves to write content for blogs, podcasts, design websites, logos, brochures, banners and anything that sends a message to an audience.
You can contact Daniele at the link below:


